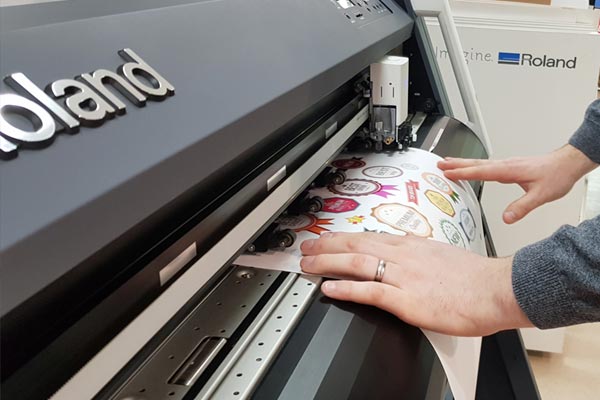
Your printer/cutter is your gateway to a diverse and profitable business, but first you have to get familiar with your cut settings. Your machine will only do what you tell it through your RIP, so how do you make sure your cut is accurate every time? Read on to find out.
First…A Little Bit of History
Traditionally, to cut out designs, no matter how intricate, you would have to create a die – a metal object similar to a cookie cutter that cut your media when pressure is applied. They were first created so that shoemakers could cut out their leather more efficiently than by hand, before becoming popular with crafters and card makers too.
Die-cutting is a real artform and certainly has a place in the arts and crafts world, but digital print and cut is a totally different proposition for businesses, and despite the term often being used interchangeably, mean very different things.
Rather than using a die, printer/cutters have a blade, or plotter, that you control digitally by sending cut data via your RIP, such as Roland’s VersaWorks. As the blade follows the edge or contour of the design, the process is known as contour cutting.
It has completely changed what is possible, taking away many of the prohibitive limitations of die-cut, such as cost and setup time, and adds so many applications, from branded stickers to t-shirt designs.
In this article, we will look to remove the mystery behind cut-settings in VersaWorks and help you benefit from the versatility and potential of cutting technology.
Cut Controls in VersaWorks
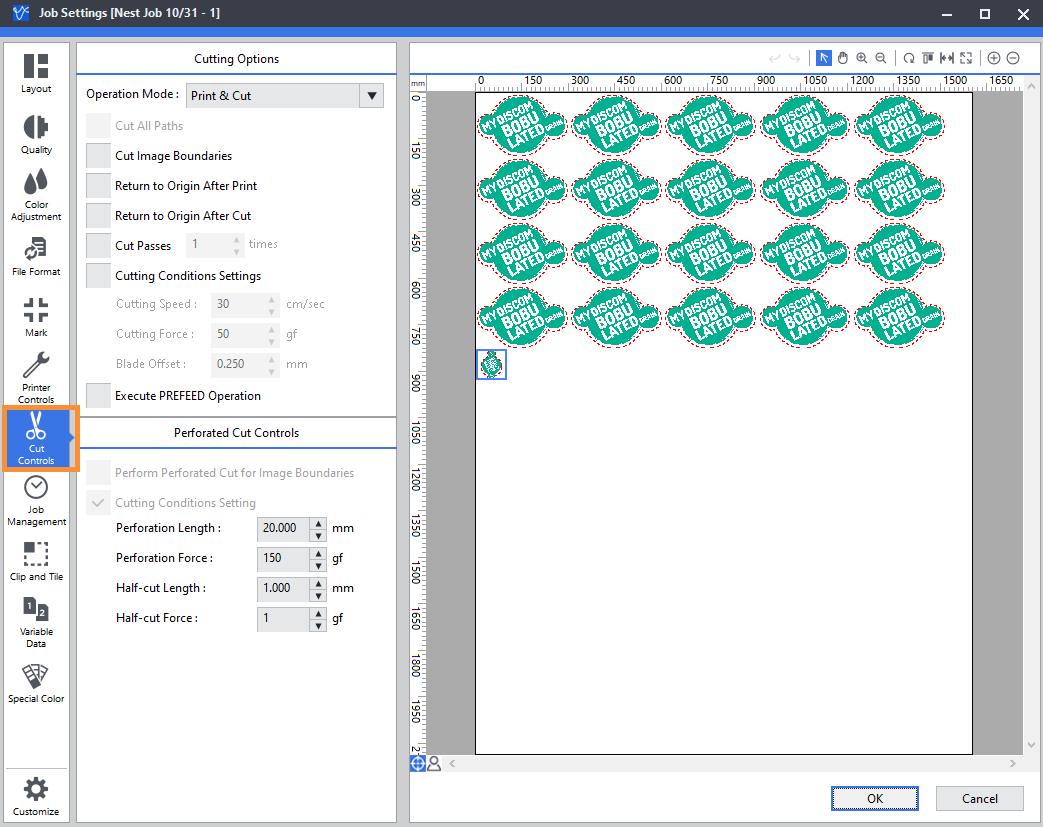
The Cut Controls section can be found in the left-hand menu of the Job Settings screen and is separated into Cutting Options and Perforated Cut Controls.
Not every media that you print onto on your printer/cutter is the same. Some are thicker than others, some don’t cut as easily, some can be affected by heat and react to different inks. That means that different cut settings suit certain jobs better than others.
Your job may also require something more complex like combined creasing and cutting for packaging mock-ups or printing an extra layer of white or special inks. The Cut Controls screen allows you full control of the cut settings and much more to get the best results.
Operation Mode
These important settings help you choose the output of the job.
- Print & Cut – The default setting where the designs are printed before they are cut
- Cut & Print – Cutting takes place first, usually in instances where the material could be affected by the print process
- Print Only/Cut Only – Print or cut, for instances like when using separate devices for each element of the job
If your business has more than one machine, using a dedicated printer and cutter allows you to keep your workflow moving. Performing a regular custom cut (more on that later) lets you load the completed print into a separate cutter so the printer can keep printing and the cutter keep cutting, helping you complete the job more efficiently.
Cut All Paths
This option isn’t used very often and is usually greyed out. However, when selected, all vector paths that are identified will be cut.
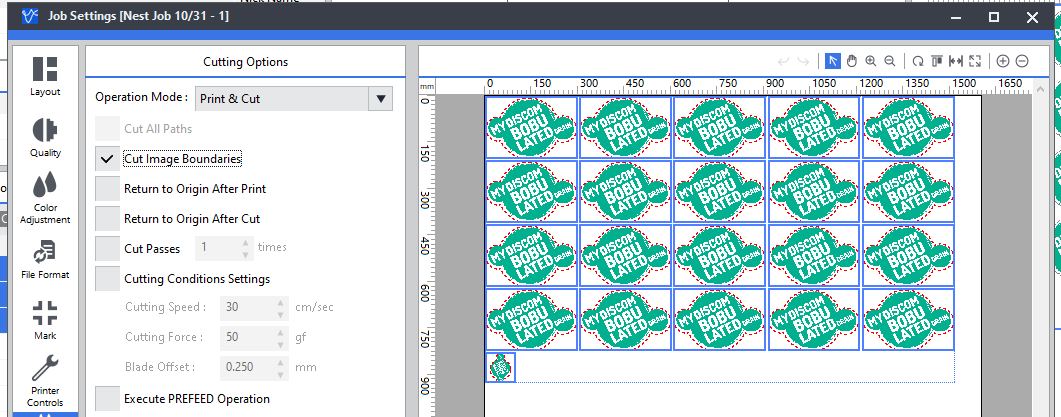
Cut Image Boundaries
Performing a straight line cut around each design can help with weeding as you can remove the main excess before tackling the more complex shapes. Selecting this option unlocks the option to Perf Cut Image Boundaries too. We will talk more about perf cut in the next section.
Return to Origin after Print
This would be used if the job requires multiple steps, for example, when printing a white basecoat before the colour layer. You can find out more about how white ink can help your digital printing here.
Return to Origin after Cut
You might require a different blade or tool (commonly a creasing tool for packaging) to cut elements within the same job, so selecting this option returns the blade to the origin and allows you to make the change.
Cut Passes
You can increase the number of times the blade makes the cut, particularly useful when cutting a tougher material and you don’t have the specialist, sharper-angled blade required.
Note: you’ll get the best results when you pair the correct blade and material, which will also maximise the blade’s longevity.
Cutting Conditions Settings
This option allows you to change the cutting speed, cutting force and blade offset position. When it is selected, it overrides the settings on the printer itself, so it’s useful when you want to create presets in VersaWorks via your queue settings.
- Cutting Speed – the default 30 cm/sec is the fastest setting, so reducing the speed can increase the quality of the cut if needed. This is particularly helpful on longer jobs where lots of media is feeding back and forth.
- Cutting Force – most ‘standard’ vinyl will require a cutting force between 60 gf and 100 gf but there is a huge variety of materials and thicknesses out there. The required cutting force will also be affected by the sharpness of the blade. For best results, perform a cut test on your device to find the right value.
- Blade Offset – the blade swivels like a shopping trolley wheel, so it is offset slightly behind the centre point to account for the curves that it follows. Most ‘standard’ blades have a value of 0.25mm but there are many specialist blades that differ. Check the box of your new blade when you install it and update this value as necessary. ‘curvy’ corners on text or 90-degree angles are common indicators of an incorrect offset value, but it could also occur if your blade is dulled or has lost its tip over time.
Execute PREFEED Operation
If you are coming to the end of a roll of material and aren’t quite sure whether there’s enough left for a particular job, the feeds the roll out first so you can tell if there’s enough room, saving you from finding out mid-run.
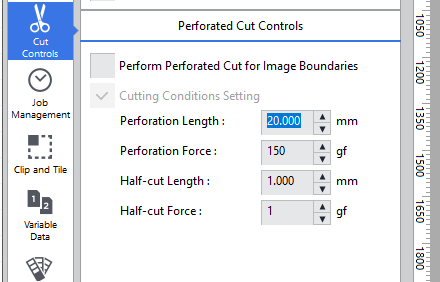
Perform Perforated Cut for Image Boundaries
You would select this option to make a simple perforated cut around the design boundary. A perforated cut (a dotted line cut) is different to the standard cutting setting as it also goes through the backing sheet to produce removable stickers or labels. It’s a little bit like a scratch card when it’s torn from its roll.
Cutting Condition Setting
Again, this overrides your device’s settings so you can save presets for specific perforated cut jobs.
In addition to using the option above to generate a perforated cut line in VersaWorks, perforated cutlines can be programmed in your design package, more on this below.
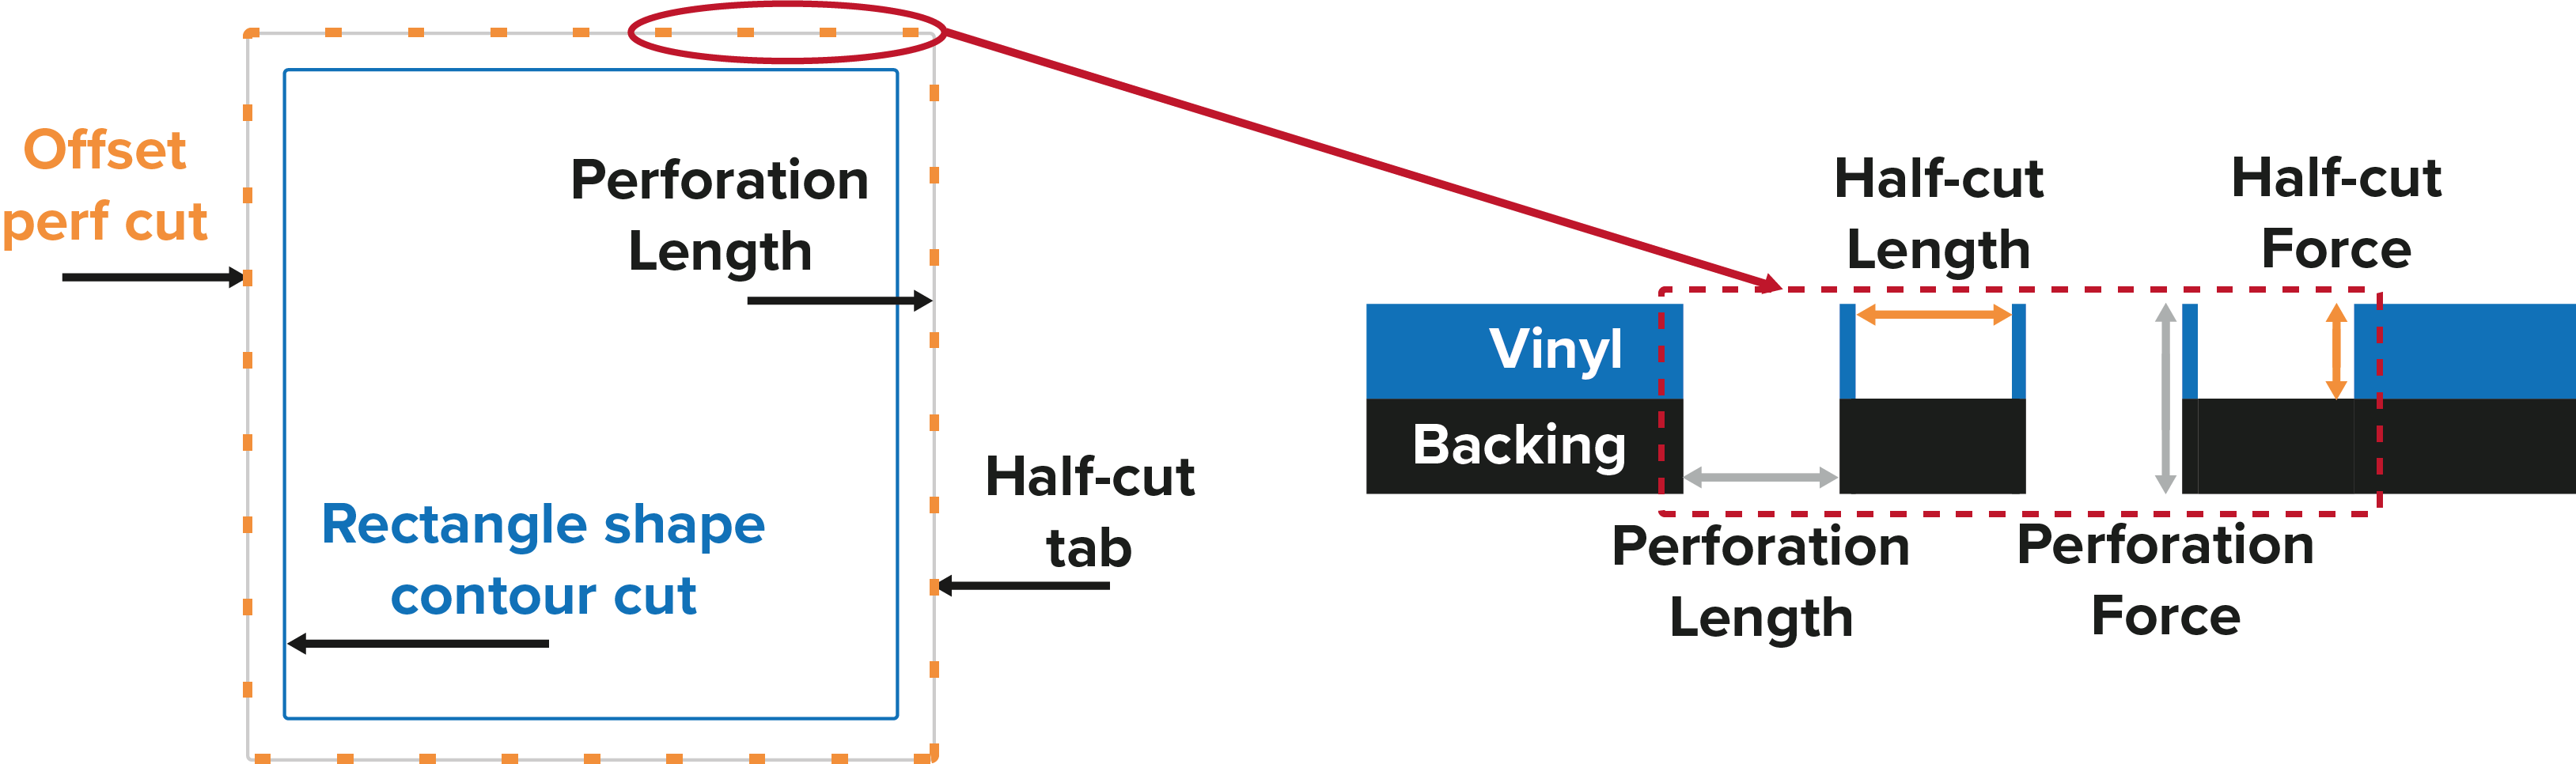
- Perforation Length – how long the cut of each perforation through the backing is
- Perforation Force – the pressure needed to cut through the material and its backing
- Half-cut Length – how long the gap between cuts is
- Half-cut Force – usually the same pressure needed to make the contour cut so that the material doesn’t tear
CustomCUT
One of the most valuable features of VersaWorks (and RIPs in general) is making the most of your media so that you waste as little as possible. The default cut setting is CustomROLL, where the printer will print everything it needs to before returning to the start to make the cut. You can learn more about the different ways to print and cut here.
When performing a print and cut job, accuracy is everything. Unfortunately, the more there is to print, the more the accuracy can suffer. CustomCUT, found in Media Settings in the Layout tab, is an option that allows you to set the length of the media and dictate how often the machine will cut. The more often it cuts, the better the accuracy over longer runs. For the most accurate cut, set the height to match your job size so that there is as little white space between the custom cut artboards as possible.
Adding Cut Lines in Your Design Software
Choosing what design software to use comes down to personal preference. There are plenty available, but Adobe Illustrator or CorelDRAW are popular choices for this type of work as they can combine vector and bitmap information.
A cut line for the purposes of print and cut is an outline added to your vector file, either following the edge of the print or more usually slightly offset from it, that tells the cutting machine where to cut. This line isn’t printed, it’s only there to define the cut path your cutter should follow.
It’s recommended that a powerful design package is used to create your designs and define the print and cut settings. However, for those less technically minded, VersaWorks includes a useful feature called “Job Assistant” where you can make simple adjustments to the cutting line on imported pdf files. Job Assistant simplifies the cut settings significantly and lets you draw and merge cut lines, determine the type of cut and amend various other useful options.
If you are more confident using Illustrator or similar, it’s still a fairly simple process to add a cut line. Start by making a copy of the design with no fill, giving it a 0.25 pt stroke and name the layer "CutContour" so the RIP can identify it.
Contour Cut Vs Perf Cut
The blade cuts with remarkable accuracy during a contour cut. Set at the correct pressure, it will cut through the hair-thin vinyl, only kiss the backing, so you can easily peel it off the intact paper. The vinyl layer doesn’t provide too much resistance for the blade, meaning it can cut much more intricately than when cutting both layers. The blade will also stay sharper for longer.
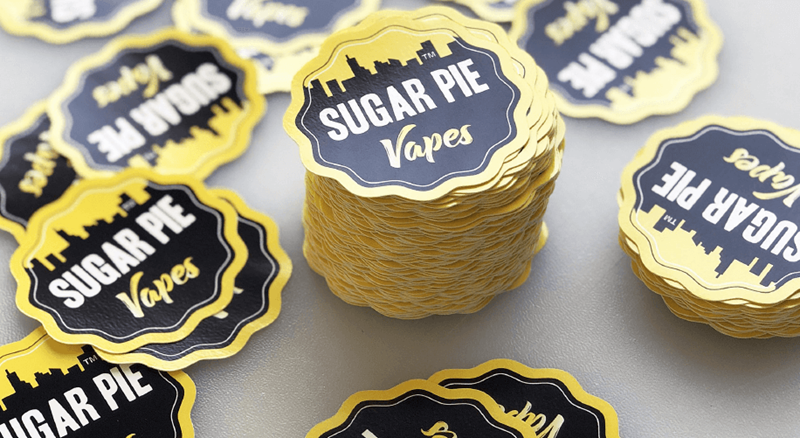
You can, of course, cut through the backing layer too and this would be done by making a perforated cut. Think about a pile of the stickers that you can hand out individually, perfect for including in orders, taking to tradeshows and or advertising your business in other ways.
Perf Cut is a tick box that can be found in the Cut Controls of the Job Settings menu in VersaWorks 6. Using this setting, you can apply a basic perforated cut around your design but for more advanced options, you can program cutlines using a spot colour called “PerfCutContour” in your design package.
Conclusion
Mastering your cut settings can really impact the efficiency of your business and increase your selling potential. For more information on what we’ve covered in this article, contact a member of the Roland team today.