
For our latest series of digital print applications, we’ve explored the lucrative market of personalised wedding products. The global wedding industry is expected to reach $128 billion by 2026, growing at a CAGR of 4.9% from 2021 to 20261. As a digital print professional, there are several ways to tap into this market and give your business an extra boost.
In this article, we’ll show you how to print personalised stickers for small candle wedding favours, but this process can work for any personalised sticker, or indeed any kind of print-and-cut product.
Equipment used:
- VersaSTUDIO BN-20A printer/cutter
- White adhesive vinyl
- Adobe Illustrator
- VersaWorks 6 RIP software
The Artwork
- First, we researched similar products on Google Images and on Etsy. This gave us a good idea of the types of products which were popular with the target customers.
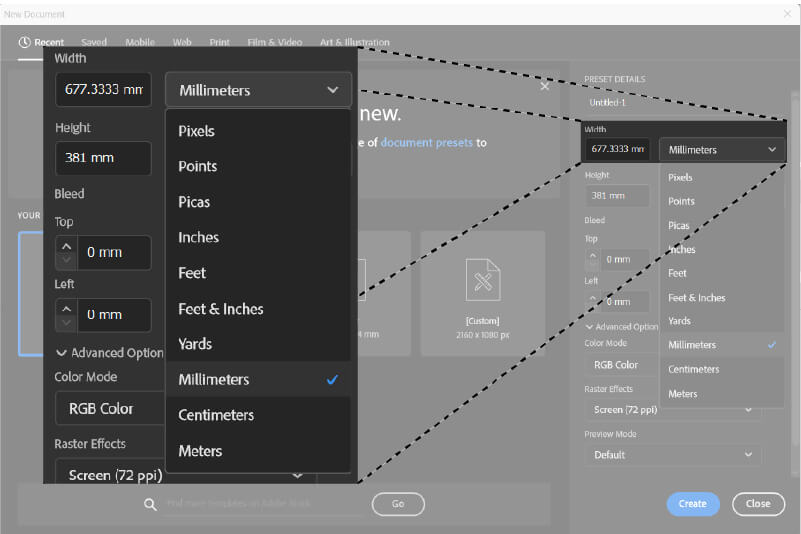
- With the rough design in mind, we opened a new Adobe Illustrator document, ensuring that the units of measurement were set to millimetres, rather than pixels to ensure the artwork was produced at the correct scale.
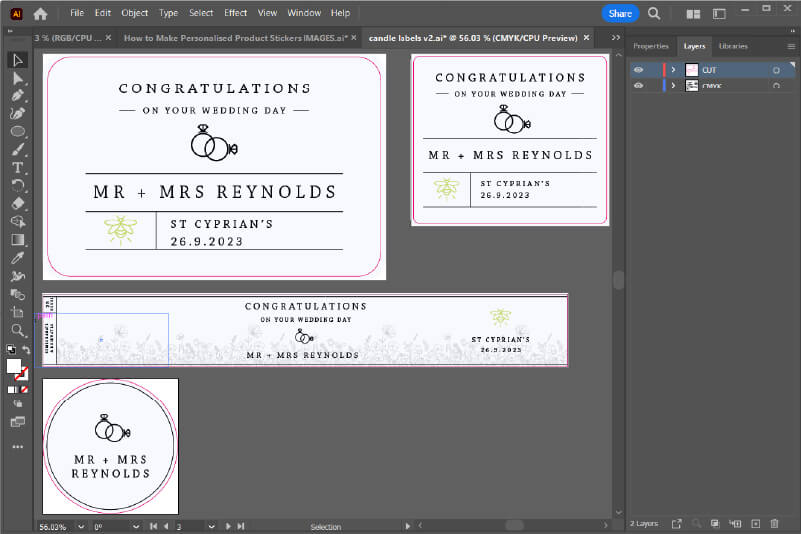
- Typography played a big role, so we selected Chapparal, a simple and elegant serif font from Adobe’s Wedding Charmers font pack. We also created some simple icons to add some additional graphical detail.
- Having selected the basic design, we arranged the elements in an editable configuration. This was important as we would be creating these labels for a variety of candles in differing shapes and sizes, and we would need to rearrange and resize the elements. This is also essential if you are creating personalised stickers as you may need to amend the names, even in a single customer order.
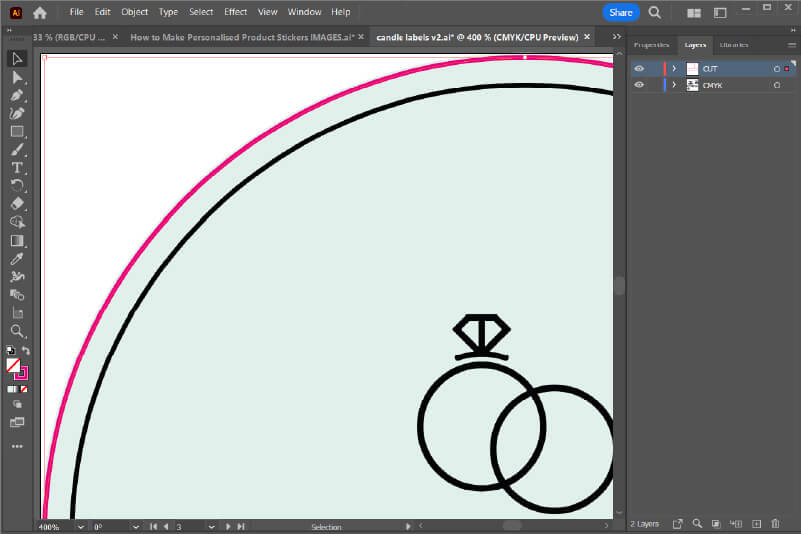
- Once we were happy with the design, the final stage was to add cutlines to the artwork. We created a new layer in our Illustrator file, which keeps the document tidy and makes it easier to edit cut lines without accidentally making changes to the colour data.
To add the cutline, we had to set the stroke colour to a special spot colour from the VersaWorks swatch library called CutContour and set the weight to 0.25. We also included a small amount of bleed outside the boundaries of the cutline – even with highly accurate cutting, it’s good practice to include bleed with any print-and-cut job. - With the cutlines added, we saved the file as a PDF, ready to be added to the RIP later.

Producing the stickers
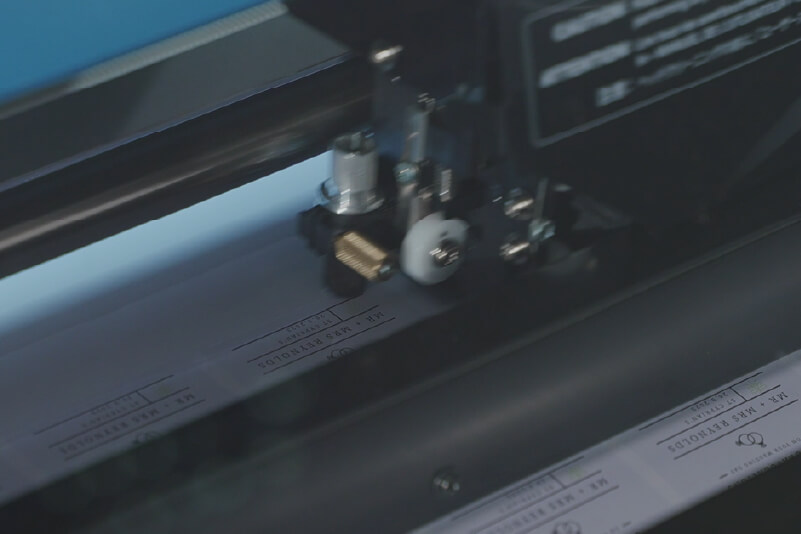
- First, we selected an appropriate media for the job, then loaded it into the printer/cutter, ensuring it was loaded straight and in line with the pinch wheels.
- Once the media was loaded, we secured it in place by lowering the pinch wheels, then started the automatic set-up process – this detects the width of the media and feeds the data back to the VersaWorks RIP.
- The next step was to perform a test cut to ensure the cut force was appropriate for the media. Test cuts create a small inner (square) and an outer (circle) section. With the cutting force set correctly, you should be able to remove the outer section easily without also removing the inner section. Additionally, the cut should not also score the backing sheet.
- We then performed a test print to ensure that all the ink nozzles were firing correctly, and the bidirectional alignment was properly configured for the media installed.
- Once the media was installed and all the calibrations were satisfactory, we added our PDF to the VersaWorks 6 RIP by simply dragging the file into the RIP queue. We opted to set the print quality to its highest setting and ensured that the cut settings were adjusted to ‘print and cut’, before clicking the ‘print’ button.
Applying the stickers
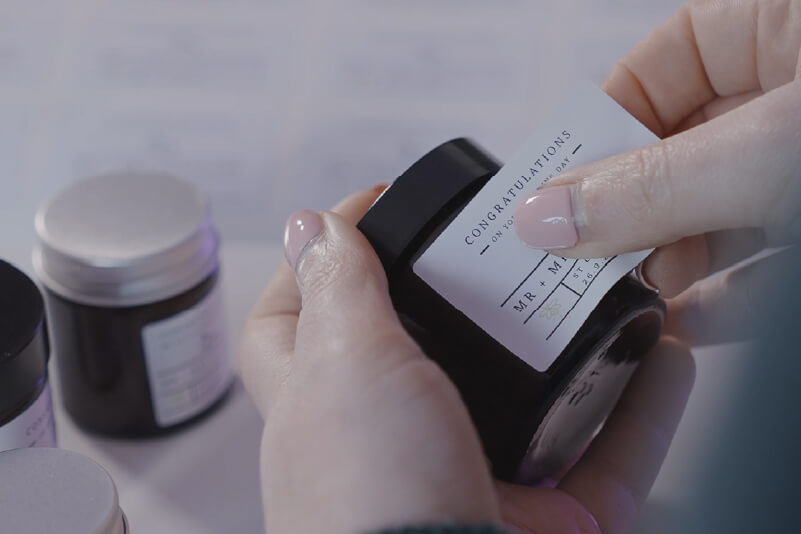
- When the print was completed, we trimmed it off the roll and inspected it to ensure it had turned out as we’d planned. We were pleased to see that it looked great and, even on stickers only 30 mm wide, the text was sharp and perfectly legible.
- The next step was to clean the blank candle jars with isopropyl alcohol and a fine cloth to remove any oils or residue.
- We weeded the excess material from the sheet and, one-by-one, we applied the stickers to the jars, taking care to apply them straight and in a uniform position, whilst avoiding any creases or bubbles.
Conclusion
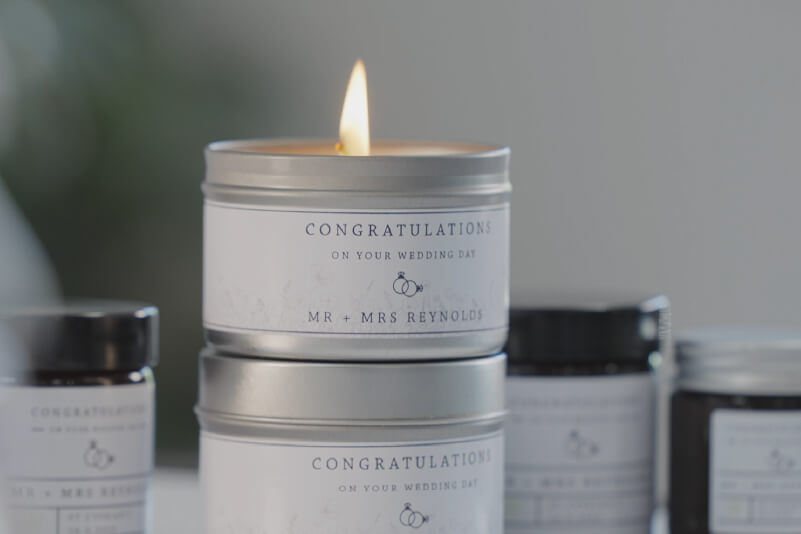
We were really happy with how these personalised wedding favours turned out and they’d surely be a welcome surprise for any wedding guest. If you’d like to know more, check out our recent article on printing personalised packaging, which has a few more ideas for products you could add to your business.
Otherwise, if you have any questions, get in touch with a Roland print-and-cut expert who’ll be happy to help.