
If you’re running a personalisation business, the wedding market is one you can’t afford to overlook. There are tons of opportunities for producing all kinds of items for the big day, but you don’t need to stop there. In a recent survey, it was discovered that people are paying 62% more1 on stag and hen parties than they were a decade ago, with men willing to spend more than twice as much as women2, so it’s a lucrative area to expand your product range.
In this article, we’ll talk you through producing a personalised stag-do T-shirt using a printer/cutter, some heat-transfer vinyl and a heat press.
Equipment used:
- VersaSTUDIO BN-20A printer/cutter
- Printable HTV
- Heat-transfer application tape
- Adobe Illustrator
- VersaWorks 6 RIP software
The Artwork
- Before we started with the artwork, we did a little research into the types of stag-do T-shirts on the market. There is a wide variety available – some of which are funny, others downright rude! In general, photographs of the groom feature very regularly, so we knew that a print-and-cut application was the best option.
- We built the design using Adobe Illustrator and a photograph from a stock library. We made sure to choose one with a plain white background, making it easier to mask and create an accurate cut-line (more on that later). For the text, we used Berlin Sans FB, a chunky and informal font that fit the mood. Bear in mind: if you are using stock assets of any kind to produce sellable items, be sure to check the terms of the license and ensure that you are allowed to use the assets for commercial purposes.
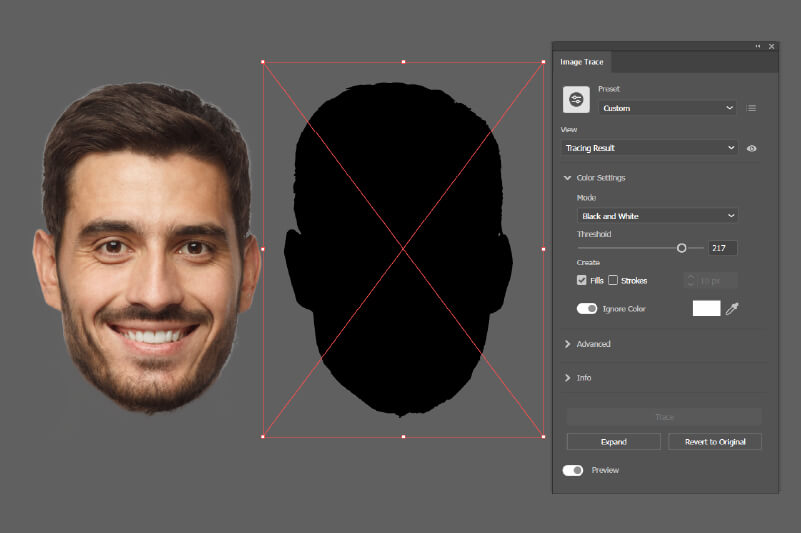
- We wanted to add a thick stroke around the outline of the photograph which would also be the basis for the cut line. To do this, we used Illustrator’s Image Trace tool, first duplicating the image then tracing it, adjusting the threshold slider until we got a desirable result. We then expanded the trace to obtain a vector outline of the photo. If you are doing this, you may need to play with the settings to get a result you like or simplify the design to remove any harsh angles. To increase the margin around the photo, we used the Offset Path tool.
- To produce the text areas, we first typed the text using the Type tool. When we were satisfied, we converted the text into a vector image using the Create Outlines tool – this made it easier to add a consistent margin around the text with the Offset Path tool but be aware that once the text has been converted to a vector, it is no longer editable.
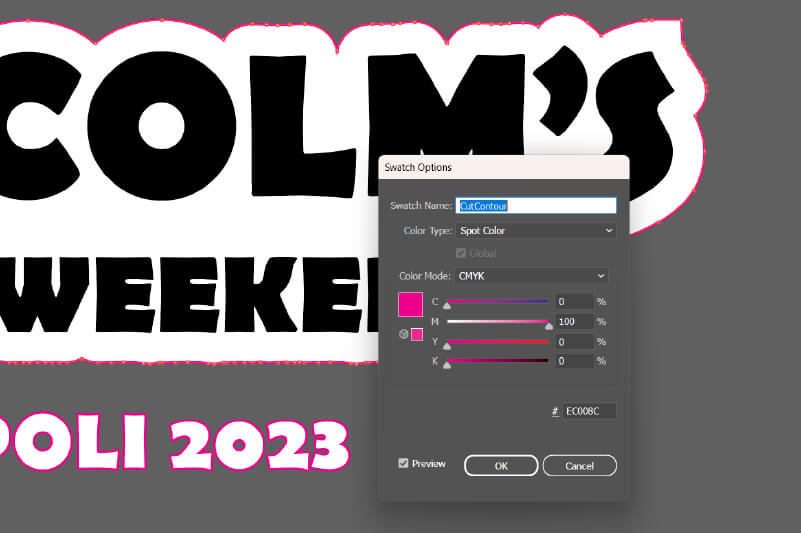
- Now that we had all the graphical elements, we had to produce the cutlines. This was a simple matter of taking the extreme edges of the vector graphics, duplicating them and setting the stroke to a weight of 0.25 and a spot colour named CutContour. Since we were printing on white media, and all the borders were white, there was no need to include a bleed area.
- With the graphics finalised and the cut lines added, all that was left was to export the file as a PDF which VersaWorks could interpret.


Producing the Print-and-cut Heat Transfer
- We first loaded printable heat-transfer vinyl into the printer/cutter then, ensuring it was straight and aligned with the pinch wheels, we secured it in place by lowering the pinch-wheel clamp. We were then ready to perform the automatic media setup process which fed the media width back to the RIP.
- Next, we performed a test print and made any necessary adjustments – this is something you should do every time you change to a different type of media to ensure you get the best quality from your prints.
- We then performed a test cut to find the appropriate cutting force for the media. Test cuts create a small inner (square) and an outer (circle) section. With the cutting force set correctly, you should be able to remove the outer section easily without also removing the inner section. Additionally, the cut should not also score the backing sheet.
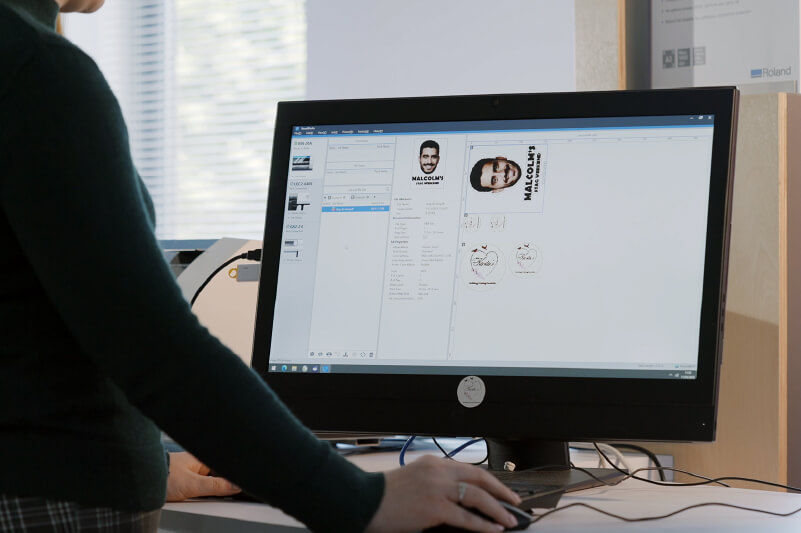
- With all our tests and calibrations completed, we imported our PDF into VersaWorks by dragging it into the queue. Before printing, we checked the settings to ensure that the print quality was appropriate and that the cut settings were set to ‘print and cut’.
Applying the Heat-transfer Vinyl
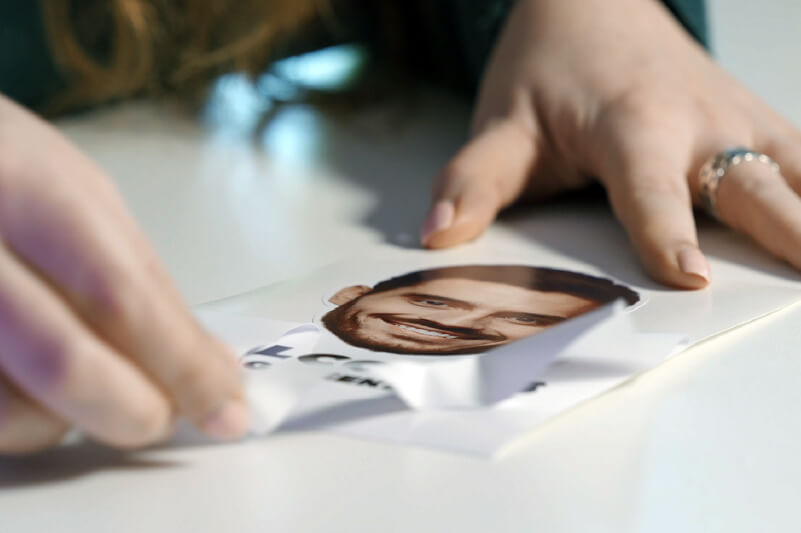
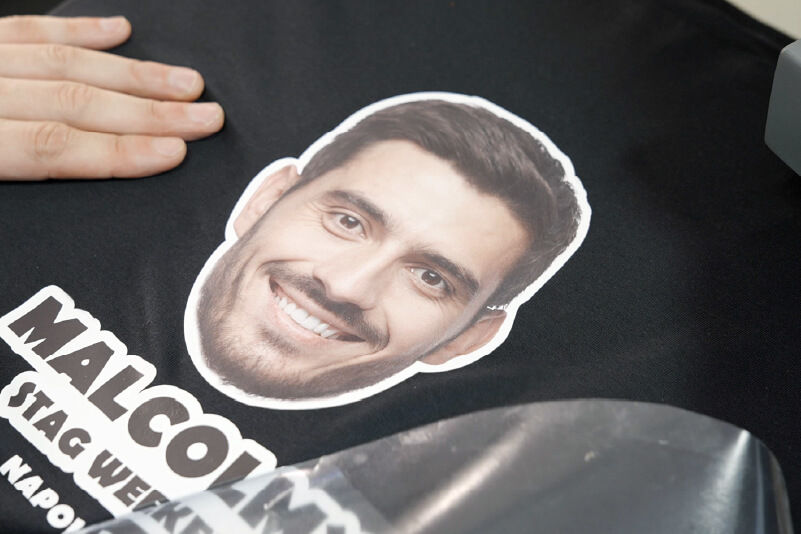
- After the printing and cutting had finished, we trimmed the graphics from the roll and took it to the application table where we weeded off the excess.
- Next, we cut a section of heat-transfer application film slightly larger than the graphic. Note that there are several types of application films available, so check with your media supplier to ensure you’re using the film appropriate for your vinyl. We placed the film on the graphic and used a squeegee to firmly affix it in place. Then, we turned both the graphic and the film over, and peeled away the backing sheet, ensuring that every element was securely attached to the transfer film.
- We then switched on the heat press, setting the temperature to 153°C (~307°F). Temperatures and pressing times will vary depending on the material of the garment and the type of HTV used, so be sure to check the recommendations from your media supplier and perform a test if you’re uncertain.
- When the heat press had reached the right temperature, we added the T-shirt to the platen, ensuring that it was straight, and pressed it for a few seconds to preheat the fabric and remove any creases.
- We then placed the transfer film with the graphic facing outwards and clamped the heat press down for around 14 seconds – again, the timing may vary in your case. Once the time had elapsed, we carefully removed the backing sheet and admired our work.
Conclusion
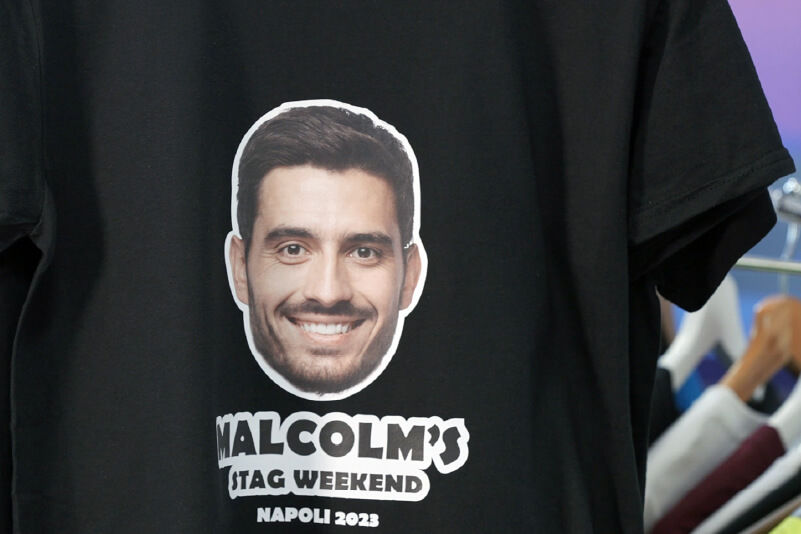
There you have it – if you already have a printer/cutter, this is a great way to make it work for itself even more. You can also make heat-transfer T-shirts using a vinyl cutter, or with DTF technology – check out our page on printing T-shirts for even more ideas.
If you’ve got an idea to expand your business with digital print technology and you need some advice, get in touch with one of our experts who will be happy to help.
1. https://swnsdigital.com/uk/2022/05/the-average-stag-and-hen-party-now-costs-each-guest-an-average-of-242-61-per-cent-more-than-a-decade-ago/2. https://yougov.co.uk/topics/society/articles-reports/2016/11/12/stag-and-hen-parties-men-are-willing-splash-twice