We’ve been looking towards the wedding market for ideas on what sort of personalised products are popular with customers. It’s a growing market and ideal for companies looking to expand what they offer, with the global wedding industry projected to be worth $128 billion by 2026, growing at a CAGR of 4.9% from 2021 to 20261.
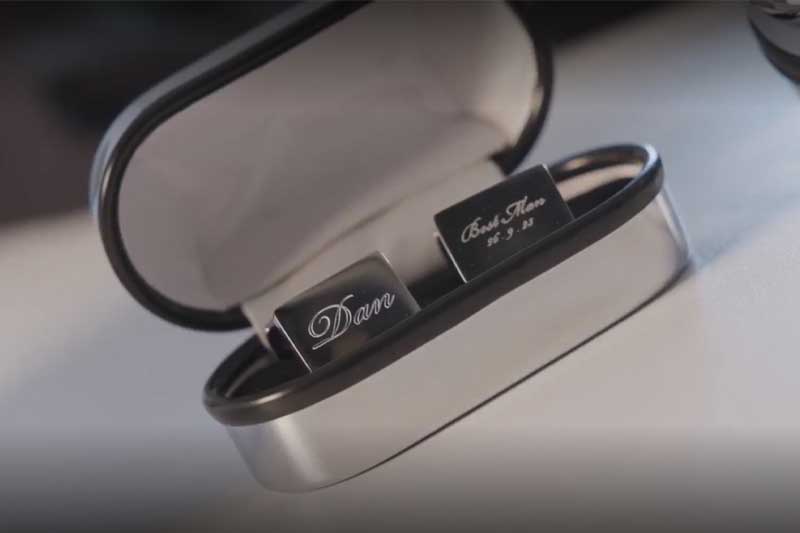
There are many people who help make a wedding such a memorable day for the happy couple, so a keepsake like personalised cufflinks is a great way to say thank you and leave a lasting impression of the day.
Equipment used:
- VersaSTUDIO MPX-90S
- Stainless steel blank, engravable cufflinks
- Stainless steel blank, engravable cufflink box
- Roland Metaza Studio
The Artwork
- We took to the internet to discover what products were popular with customers and, thanks to Etsy and other similar websites, we found that engraved gifts were always high on the wish lists of customers wanting to give guests something to remember their day by. We chose to make personalised cufflinks and a cufflink box as a gift for the best man, using the VersaSTUDIO MPX-90S impact engraving machine.
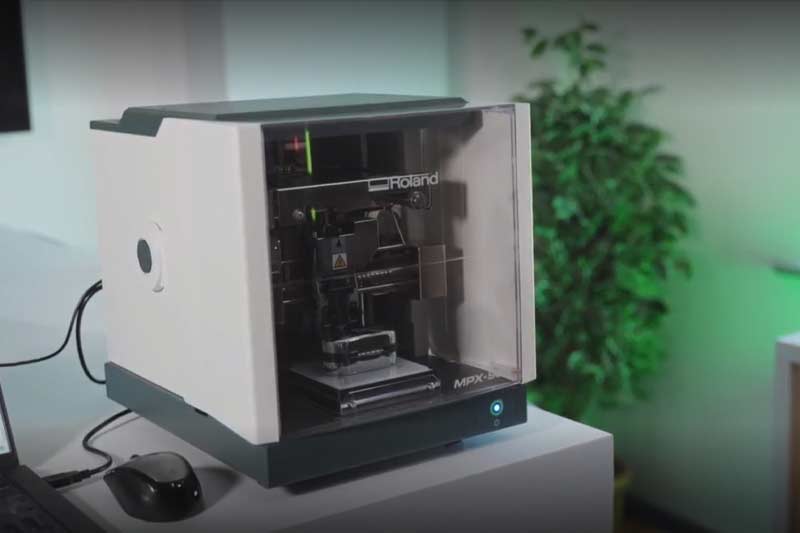
View of the MPX-90S - The first step was to measure the printable surfaces of the cufflinks and the cufflink box in millimetres. While the cufflinks were completely flat, the box had a curve to it, so we measured a centralised area where the radius was largest to ensure the flattest surface for the engraving.
- Given that the surface of the cufflinks was so small, we made a simple text-based design in Adobe Illustrator, sized at 100%, and using the same elegant Bickham Script Pro 3 typeface that we used in some of the other applications in the series. The text was different on each item, so we created a separate file for each design and converted the text to outlines before exporting.
- Rather than export the file, we chose ‘Save As Type: Illustrator EPS’, selecting Illustrator 8 EPS under ‘Version’ in the ‘EPS Options’ pop-up menu. This file is readable by Roland Metaza Studio, the software that the MPX-90S uses to complete the designs and send the information to the device.
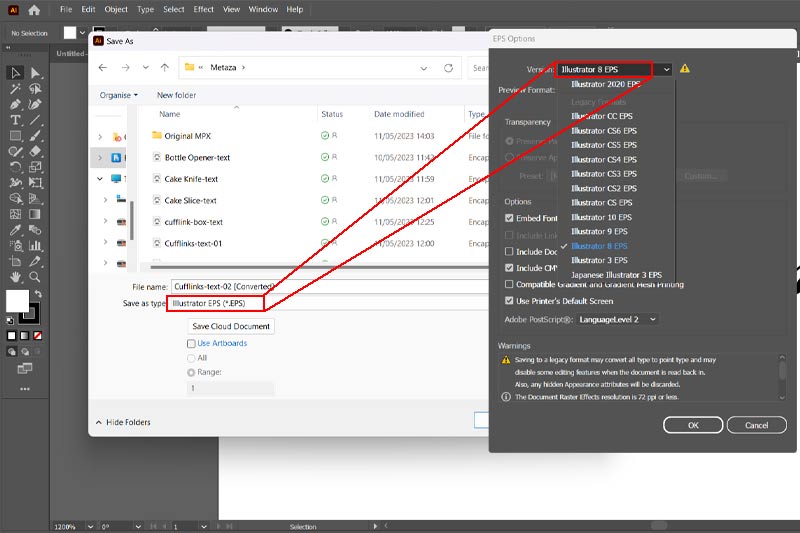
View of how to save an Illustrator EPS 8 file
Engraving the Cufflinks and Box
Each item was engraved individually, but the process was the same for each.
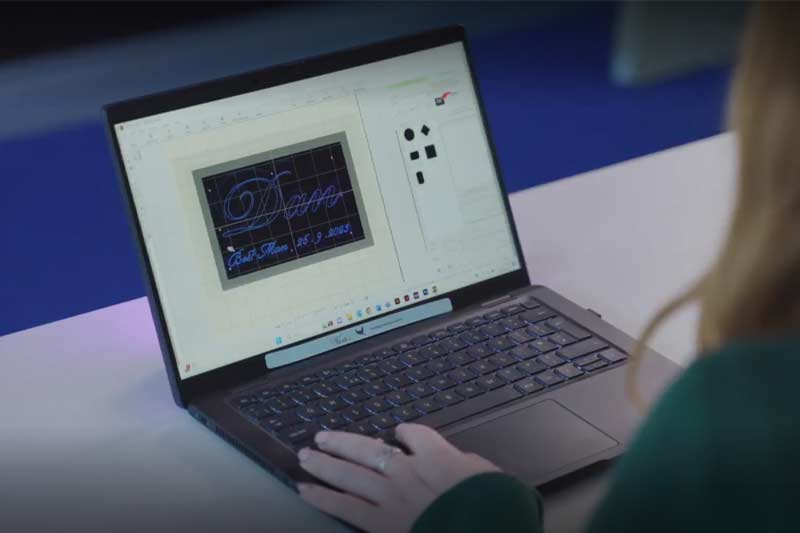
- Once we’d saved the correct file type, we opened Metaza Studio. The artboard opens as a grid, the same size as the MPX-90S’s engraving surface, which is divided into 50-millimetre squares. We clicked ‘Import’ and chose the first of our files, which opened in the centre of the grid, displaying a fine outline of our text.
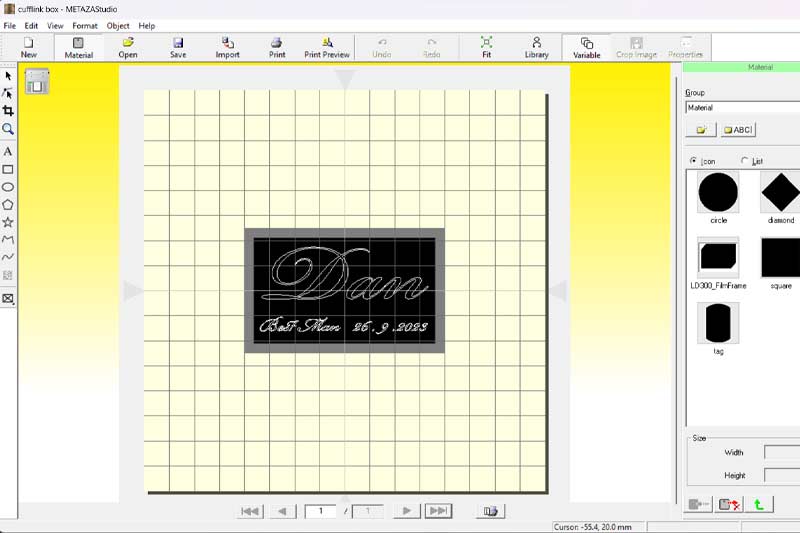
View of the Metaza Studio artboard - There are various edits you can make in Metaza Studio, such as crop, create shapes or add text, but we had already set out our artwork the way we wanted it so were ready to press print when our object was in place.
A person working on Metaza Studio - The MPX-90S comes with a flat table and a vice to hold the objects in place, depending on what that item needs. We used the vice to secure our cufflinks in the centre of the table. We took particular care to line them up perfectly making sure to accommodate the post and toggle underneath (the parts we weren’t engraving on), which were rigid and at an angle.

View of the cufflink help by vice - Rather than using the vice, we opted for the flat table to engrave the cufflink box. The bottom of the box was flat and easily placed on the anti-slip mat of the table, so it was perfectly secure.
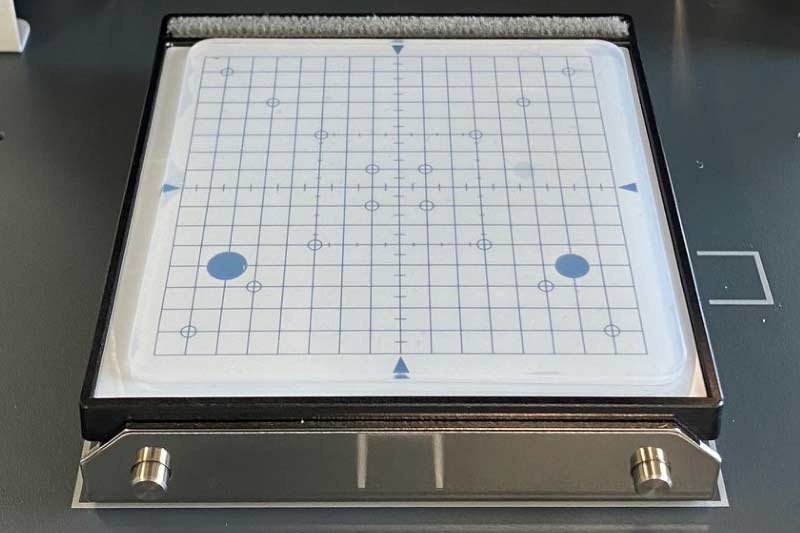
View of the non-slip Metaza table - If you have spare items, it’s recommended that you do a practice print to make sure that everything is aligned properly. While the grid is accurate, the machine is incredibly precise, so any slight misalignment will be noticeable.
- Once we were happy that the item was in place, we closed the cover of our machine and went back to Metaza Studio to press print.
It’s important to note that the computer or laptop needs to be on at all times during the engraving. If it goes into standby mode, the connection between Metaza Studio and the MPX-90S will be cut and the engraving will cancel, which will likely waste that object. To avoid this, go to your computer’s standby settings and extend the time, or better still, switch standby mode off altogether. - Our designs were simple, so engraving was fairly quick, but the results were excellent, perfectly legible and very accurate
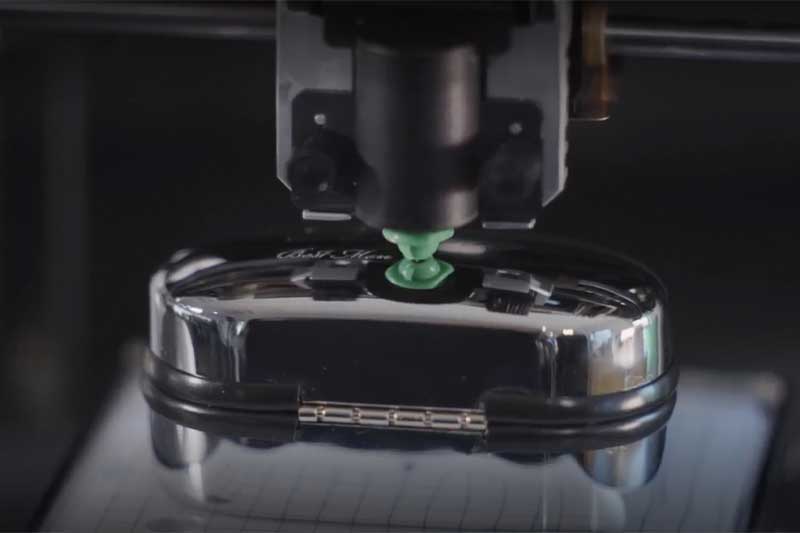
A close up of a the MPX-90S engraving
Conclusion
Engraving is a particularly impressive way of customising all sorts of metal objects. We chose to engrave text because of the size of our items, but it’s just as simple to engrave images or to use a combination of techniques, whether you’re engraving keyrings, bottle openers, magnets, hip flasks or any other metal item.

If you’d like to know about other wedding applications we’ve tried, check out the rest of our series, which has more ideas for products you could add to your business.
Otherwise, if you have any questions, get in touch with a Roland expert who’ll be happy to help.
1. ResearchAndMarkets. "Wedding Industry - Global Outlook and Forecast 2021-2026." October 2020.